
With Connectify Hotspot you can easily turn your Windows 10 PC into a Wi-Fi hotspot and share any Internet connection with computers, mobile devices, and friends. Whether you’re at home or traveling in airports or hotels, the Connectify Hotspot PC software is the easiest way to make sure you’re always connected across iPads, smartphones, kindles, and all of the other Wi-Fi-enabled devices that you use on a daily basis. Check out the short video and easy tutorial below to learn how to turn your Windows 10 PC, laptop or tablet into a Wi-Fi hotspot at the click-of-a-button.
Step 1: Click here to download and install the latest version of Connectify Hotspot. Once installed, click the purple ‘Try It Out’ button to start using Connectify Hotspot. There’s no need to create an account!
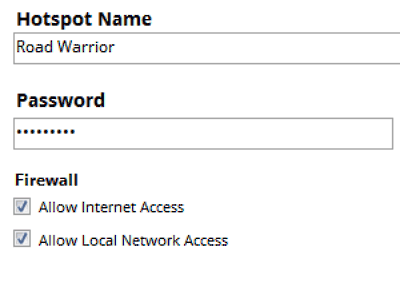
Step 2: Give your Hotspot a Name (up to 32 characters). Your Hotspot Name or SSID is the network name that other devices will see and connect to. Use emojis with that to set it apart from others and have fun with it!
Step 3: Protect your Connectify Hotspot by giving it a unique password. Your Hotspot is kept safe-and-secure by the same WPA2 WiFi security standard used by most home routers
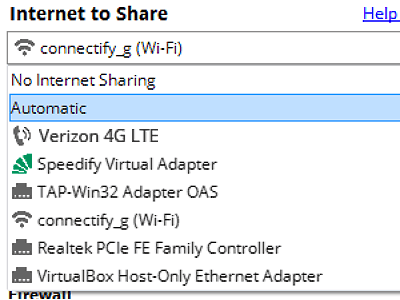
Step 4: Make sure that the ‘Internet to Share’ dropdown is set to the particular wireless or wired connection that you want to broadcast using Connectify Hotspot. You can also select the ‘Automatic’ option in order to be sure that Connectify Hotspot will continue to share the connection your device will use should you be disconnected.
Step 5: We strongly recommend making sure the ad blocking feature is enabled. This will insure a smoother internet experience for your client devices – no ads, more bandwidth, increased battery life.
Step 6: You’re ready to go, just click ‘Start Hotspot’ to begin sharing your Internet connection. Now, friends and family can connect to your Connectify Hotspot just as they would with any other WiFi Hotspot.
Setup · about two minutes
Get Connectify Hotspot running on your Windows PC
Three steps, no command prompt, no netsh commands to remember.
-
Install and open Connectify Hotspot
Run the installer and let the install finish. Connectify Hotspot opens on its own.

-
Pick what you are sharing
Choose the connection your Windows PC is already using, then set a hotspot name and password.
-
Start Hotspot
Your phone, tablet or console now sees the network name you just typed. Connect to that network like any other Wi-Fi.
Available for Windows 10 and 11
What are you waiting for? Get started with Connectify Hotspot FREE today in less than 60 seconds.
Free, PRO or MAX
Which version of Connectify Hotspot you need
The free version of Connectify Hotspot covers the setup in this guide. The only limit you will hit is the 60-minute session, and restarting the session takes one click.
Recommended: MAX adds Connectify Hotspot's Repeater Mode and Bridging Mode, which is what most people come back for later.
Available for Windows 10 and 11