

Hosted Network is a feature that was first introduced in Windows 7 and is supported on Windows 8, Windows 10, Windows Server 2012 and Windows Server 2008 R2 with the Wireless LAN Service installed. Hosted Network is closely related to ICS (Internet Connection Sharing) allowing you to share your Internet connection and is used by Connectify Hotspot to create its wireless access points.
Because Connectify depends on this feature to create its access point mode hotspots, it’s crucial that it’s in working order. Here’s a little exercise that will help you determine if your computer is having problems with Hosted Networks:
Step 1: Open a Windows Command Prompt as administrator (in the Start Screen / Menu search for ‘CMD’ > right-click on the icon that pops up > select ‘Run as administrator’) and enter the following:
‘netsh wlan start hostednetwork’
The command prompt should then show “The hosted network started.”

If you see that messaging then it’s a good chance the Hosted Network service is working on your computer. But, don’t close the Command Prompt just yet!
Step 2: Enter the following command:
‘netsh wlan set hostednetwork mode=allow ssid=MyTestWiFi key=1234567890’
Now, you should see some output stating the changes were successfully made (shown below).

If you followed Steps 1 and 2 and received the messages in the above screenshots, then Hosted Network is working correctly.
Step 3: You can now enter the following:
‘netsh wlan stop hostednetwork’
You can also close the Command Prompt and then try starting Connectify Hotspot again.
If you experienced issues running this test, Hosted Network may not be working properly for you and this may cause problems with Connectify Hotspot. If you continue to experience problems with Hosted Network, contact us at support@connectify.me
Share this Post
Setup · about two minutes
Get Connectify Hotspot running on your Windows PC
Three steps, no command prompt, no netsh commands to remember.
-
Install and open Connectify Hotspot
Run the installer and let the install finish. Connectify Hotspot opens on its own.

-
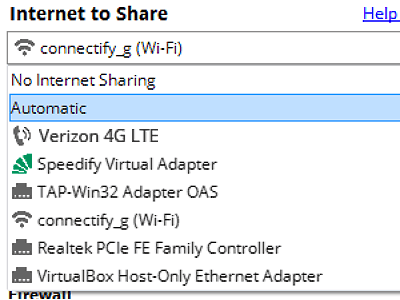
Pick what you are sharing
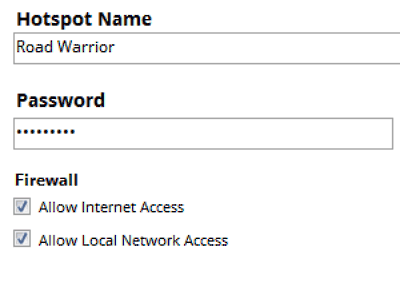
Choose the connection your Windows PC is already using, then set a hotspot name and password.
-
Start Hotspot
Your phone, tablet or console now sees the network name you just typed. Connect to that network like any other Wi-Fi.
Available for Windows 10 and 11
Available for Windows 10 and 11